How to monitor your data with Minerstat
In this tutorial, you will know how to set up your dedicated mining OS Minerstat for your mining activities.

Table of contents
What is Minerstat?
Install msOS
msOS is a minerstat-powered operating system (OS). To install it, you will need at least 16 GB of storage space, such as a hard disk or USB key, first.
Download the operating system by clicking here. After downloading, you will need to unzip the file. The image of the operating system will come out.
Then, you will need to flash this image on your storage space. To do this, you will need specific software. If you do not have one, we recommend using Etcher.
After flashing msOS on your storage space, go to the Management section and click on Workers. Click on your previously created worker and download the config.js. Move the file to your storage space. As it already exists on your image, you will have to replace it with the new one.
Then insert your storage on your machine. Turn it on and launch the boot menu (the key to launch the boot menu may be different, depending on your motherboard, but it may be F11). Then choose your storage space where msOS is stored. The installation will start, it will take several minutes. At the end of the installation, your machine will start to mine and you will be able to see his activity on the Minerstat dashboard.
Install Minerstat on Windows Software
Configure your mining
Add a worker
To add a worker to minerstat, go to the Management section and click on Workers. minerstat offers a free version where you can add a single worker. To add several machines to the service, you will need to subscribe.
Click on Add new worker. You will need to name your RIG (with a limit of 15 characters), choose its type (AMD, if your machine has AMD and NVIDIA cards, if your machine has NVIDIA cards). Then you will have to choose on the system on that you are mining . You can choose between Windows and msOS, the minerstat-powered mining operating system.
You can, if necessary, add a group to your machine. This will allow you to organize and select your RIGs when configuring them.
Once all the information has been entered, you can click on Add worker.

Add Cruxpool
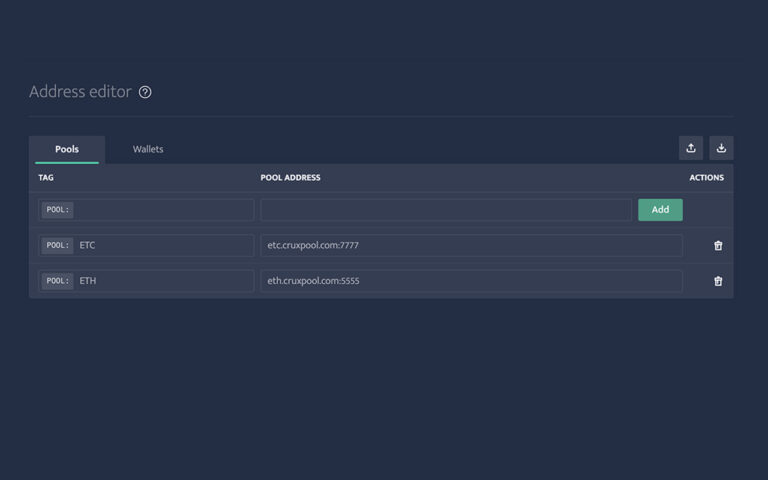
To add Cruxpool to minerstat, go to the Management section and click on Address editor.
Once on the page, add the acronym of the chosen cryptocurrency, in this case Ethereum. After that, in the Pool input, add the address of Cruxpool. Then click on Add. Cruxpool is added.
Add a wallet
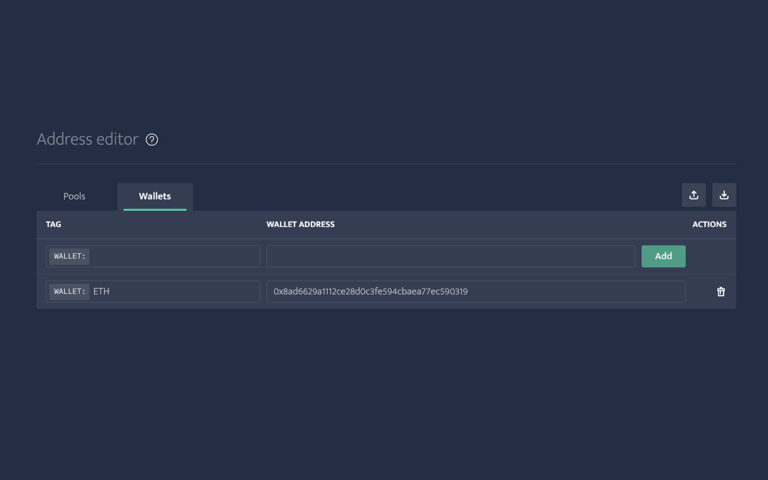
To add your wallet to Minerstat, go to the Management section and click on Address editor then Wallets.
Once on the page, add the acronym of the chosen cryptocurrency, in this case Ethereum. After that, in the Wallet input, add your wallet address. Then click on Add. Your wallet is added.
Create a template
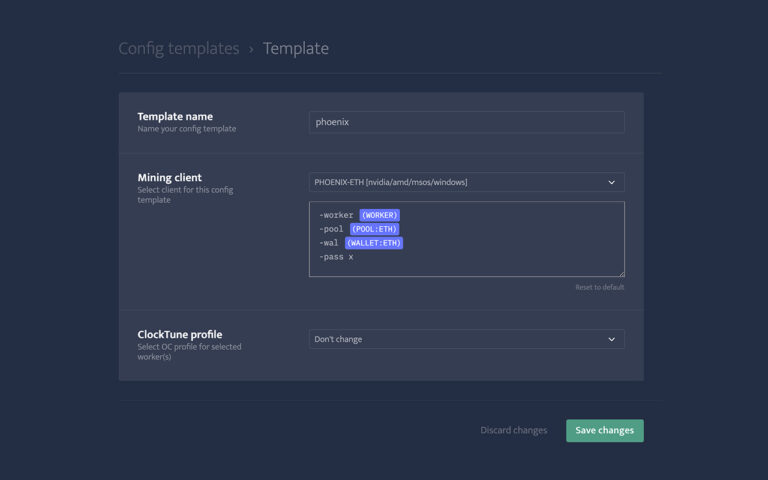
To create a configuration template on minerstat, go to the Management section and click on Config templates then Add new template.
A new page will appear. You will have to name the template, choose its client. You can add or remove specific commands using the text box below. After that, you can choose a ClockTune profile or leave it by default. This profile is actually a program to manage and overclock your graphics cards. Once all the information has been entered, click on Save changes. Your template is then saved.
Configure a worker


A configuration page will appear. You can then configure features such as the ClockTune profile, Profit Switch or CPU mining. The most important setting is the choice of your default miner. Go to the Default client section and choose the mining software corresponding to your previously made template. After your choice, click on Load from template and choose your template.
Once your configuration is complete, click on Save changes. Your mining machine is then configured.
Manage your mining

Manage your worker with Clocktune
You can manage and overclock the graphics cards on your mining machines. Click on the counter at the top right of the block that displays your graphics cards.
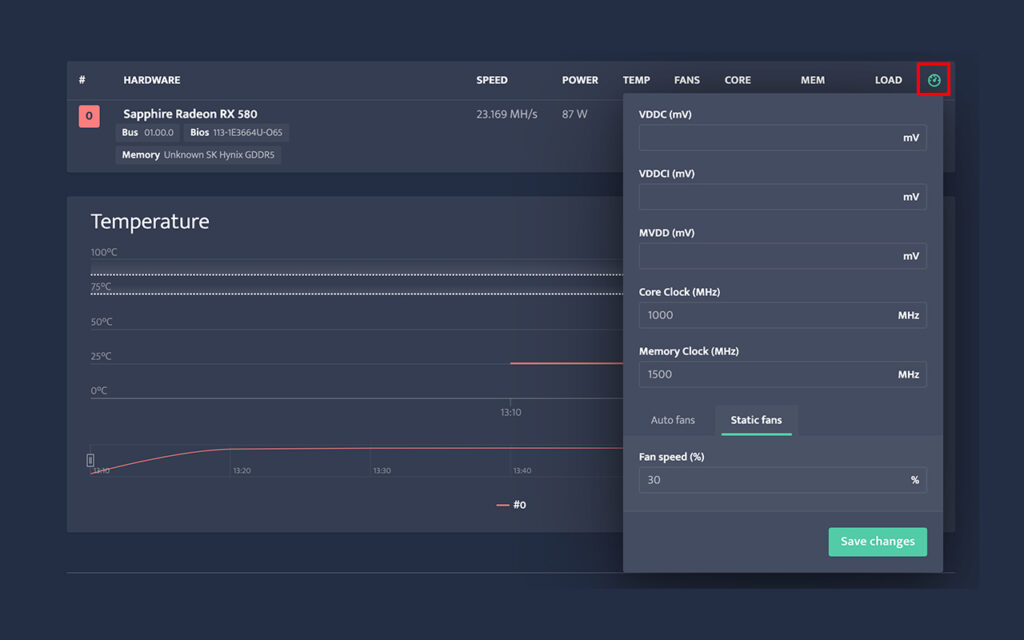
A pop-up will appear where you can adjust the following settings :
VDDC (mV)
VDDCI (mV)
MVDD (mV)
Core Clock (MHz)
Memory Clock (MHz)
Fan speed (%)
Once your adjustments are made, click on Save changes, your RIG will update itself and start to mine again with the settings you have set.
That’s it for this guide, we hope you found it useful and we invite you to visit our Support Center for more such guides.