How to set up HiveOS
At Cruxpool, it is important to get trained and learn to use the same tools as our miners. That is why we had set up “rig-sitting”, a funny name that means the idea of mining cryptocurrencies with a rig for a few weeks. The objective? To put ourselves in the shoes of our miners!
So we took care of a rig composed of two GPUs with which we had to mine on HiveOS.
HiveOS is a simple tool for mining cryptocurrencies, but we still had to learn about its different possibilities. And we asked ourselves the same question as you: How to set up HiveOS to mine cryptocurrencies?
We explain it to you in this tutorial!
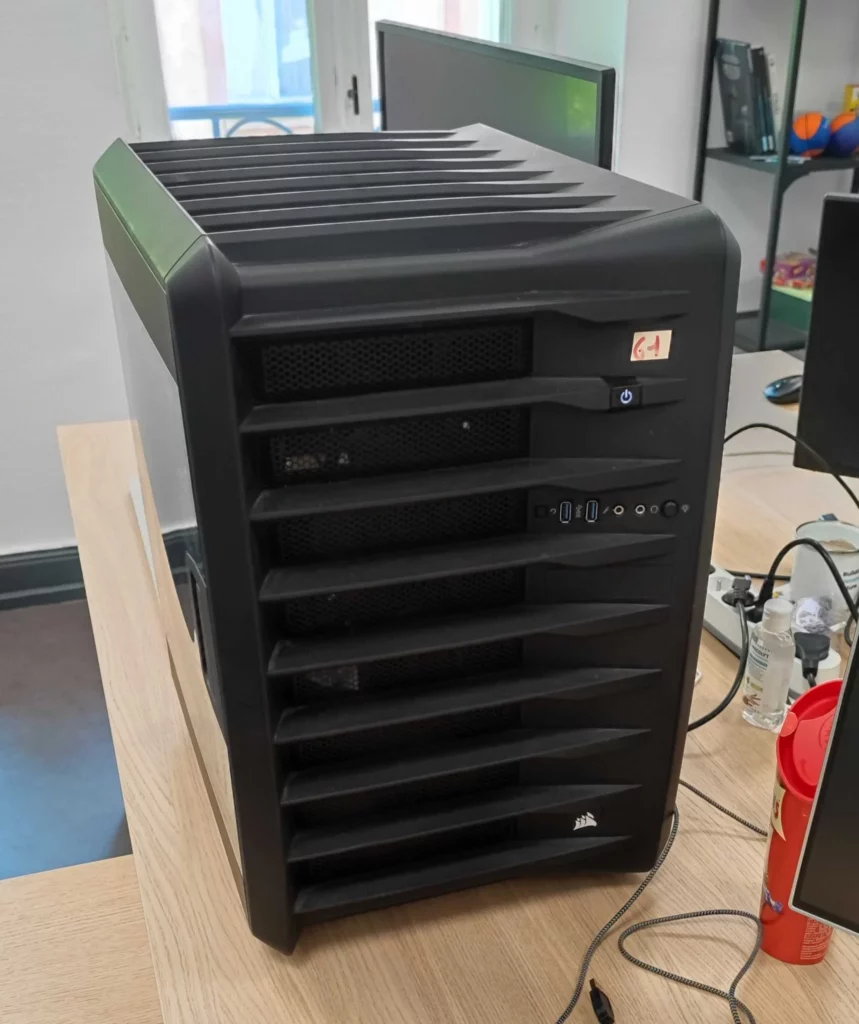
Table of contents
What is HiveOS?
HiveOS is an OS like Windows or Linux. However, it has the particularity to be a dedicated mining OS. In other words, it is only used to mine cryptocurrencies. You can easily monitor and manage all your mining in one place.
HiveOS is an OS developed on the basis of Linux distribution Ubuntu 16.04 LTS. It is a very easy to use tool for mining cryptocurrencies. Different features are available such as rig management, mining scheduling, remote, etc.
It is possible to download HiveOS to have this OS directly on your computer. There is also a HiveOS website on which to register.
Start your mining activity
Register on the HiveOS website to be able to mine cryptocurrencies.
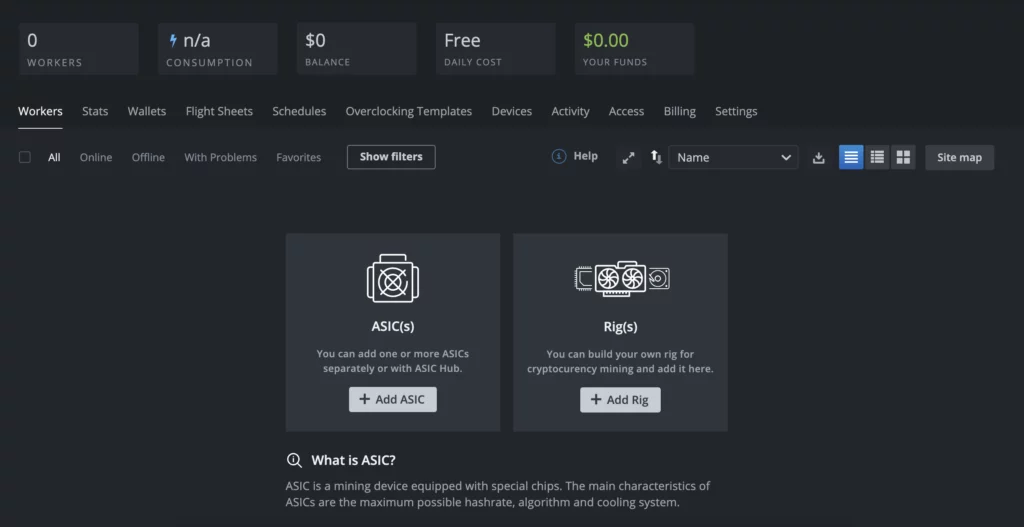
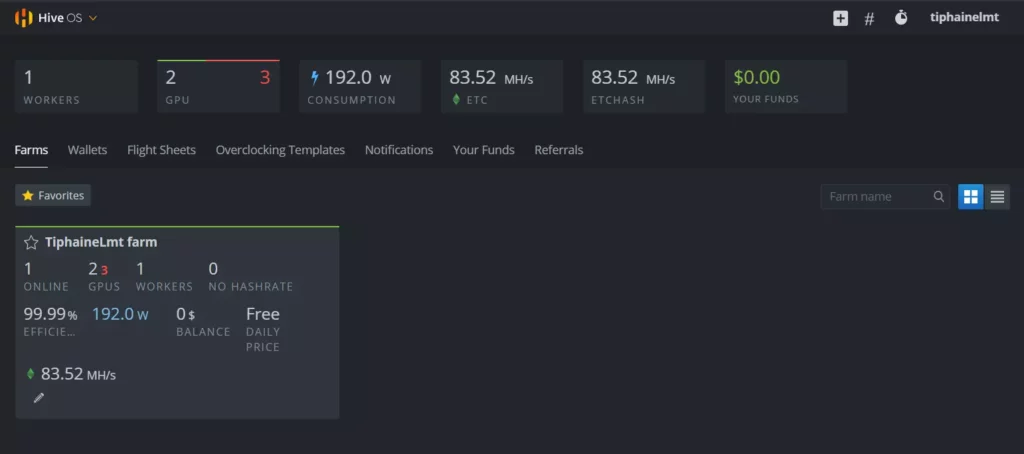
You will arrive at the HiveOS interface.

By clicking on your mining farm (“Farm”), you arrive on a new interface with different tabs. You will have to indicate a new rig, a new “worker” in the tab “Workers”.
Once you have created your worker by indicating its composition (GPUs, ASICs…), you must click on the name of your rig.
However, in order to start mining with a HiveOS set up, you must first set up certain elements: a crypto wallet and a flight sheet.
Setting up a crypto wallet on HiveOS
Specifying a crypto wallet on HiveOS is important, as this is where you will receive your cryptocurrencies.
To set up a crypto wallet on HiveOS, you need to go back to the main HiveOS interface and go to the “Wallets” tab.
Click on “Add Wallet”.
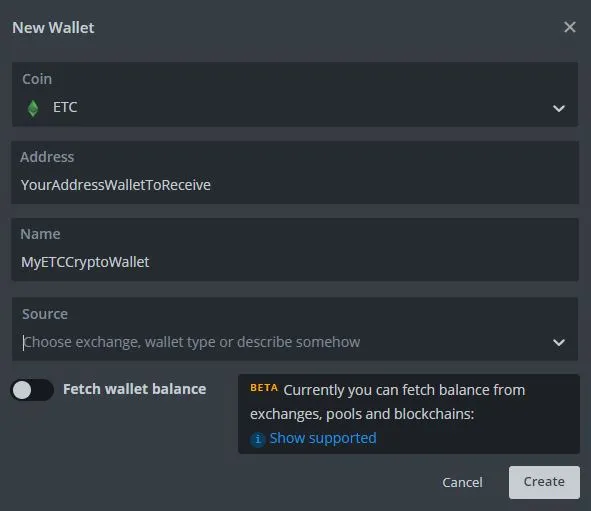
This is where you indicate the cryptocurrency you want to mine (“Coin”), the crypto wallet address if you mine anonymously or your login if you mine with a Cruxpool account (“Address”), the name you want to give to your crypto wallet (“Name”) and possibly a source to define it (“Source”).
Once all this is filled in, you can click on “Create”.
Your crypto wallet will be displayed and available on the “Wallets” page.
Setting up a flight sheet on HiveOS
Namely, a flight sheet is a bit like a logbook in which we will have all the information and tools to mine cryptocurrencies. Without a flight sheet, mining is not possible on HiveOS.
To set up a flight sheet on HiveOS, you need to go back to the main HiveOS interface and go to the “Flight Sheets” tab.
Note that it is important to have created a crypto wallet before coming to this section!
You can click on “Add Flight Sheet”.
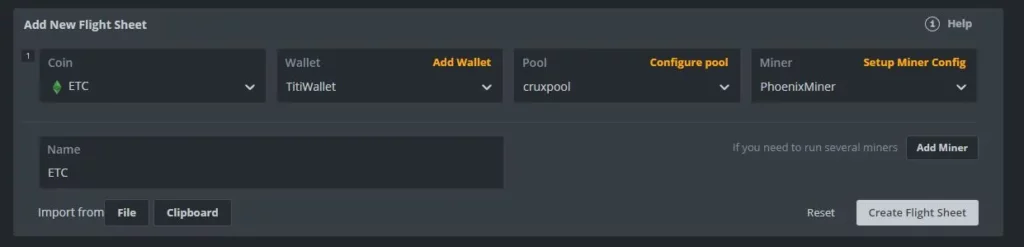
You need to indicate the coin you want to mine, the crypto wallet with which you will receive your mined cryptocurrencies, as well as the mining pool and miner (mining software) with which you will mine. You will also be able to give your flight sheet a name so that you can easily find it later.
Be careful, depending on the cryptocurrency you are going to mine, you must choose a compatible miner! Your miner must also be adapted to the GPUs that build up your rig. We invite you to discover which mining software are compatible with which cryptocurrency in our file on how to start mining.

Once you have filled in the information, you must click on “Create Flight Sheet”.
You will find your flight sheet on the “Flight Sheets” page, well and truly saved.
That’s it, you’re all set! You have created your flight sheet and your crypto wallet. You can now go back to the interface dedicated to your rig.
In this case, click on your rig and go to “Flight Sheet”, right next to the “Overview” tab.
This is where you can find the flight sheets you have created, like the one you created earlier:
All you have to do is click on the rocket to start mining cryptocurrencies!
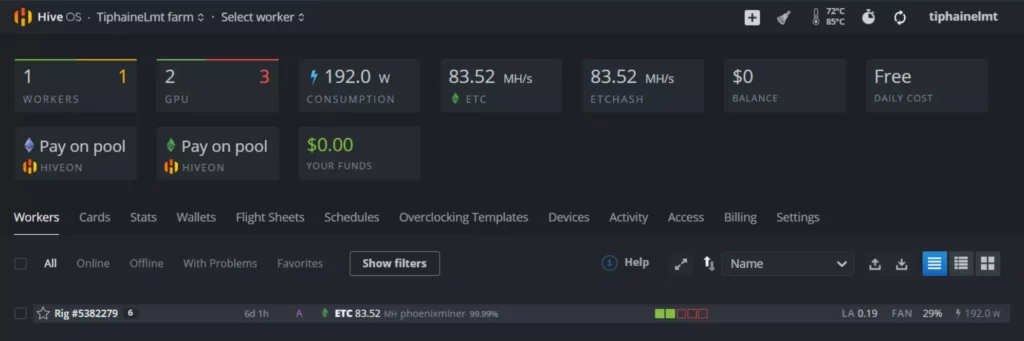
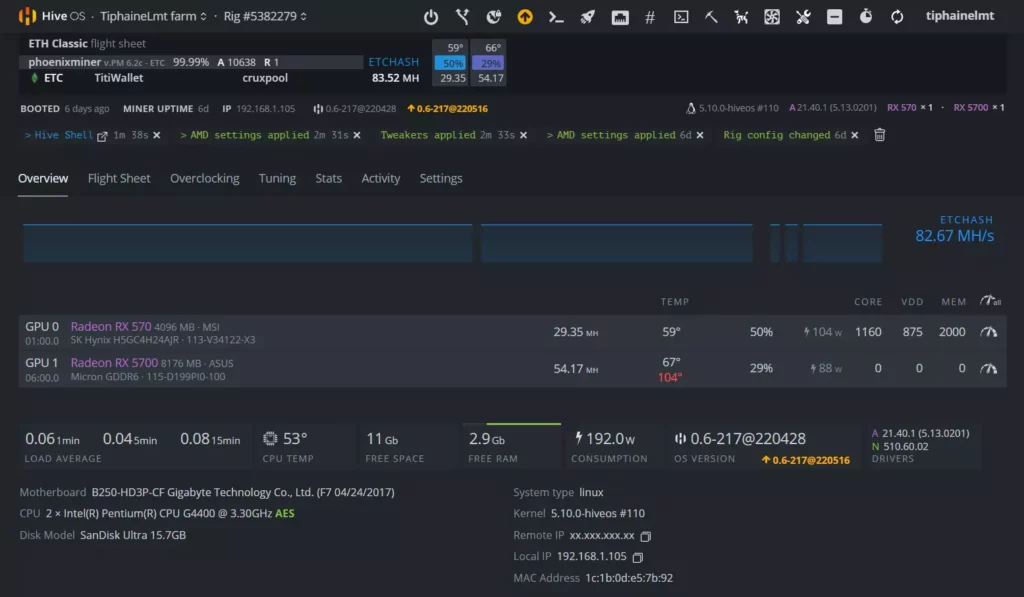
In the overview tab, you will see all the information about your rig and its mining activity (temperature, configuration, etc.).
How to manage your mining activity on HiveOS?
Manage your rig remotely with HiveOS
It is possible to manage your rig remotely with HiveOS, which is very convenient if you have to go away for a day or a vacation to check if your rig is working properly.
When you are on the main interface of your rig, click on the “Remote Access” icon at the top of the page.
Then go to “Hive Shell Start”.
A command will appear in which you must indicate “mine”.
Afterwards, you will have all the information about your mining rig on your computer, remotely from your rig. Useful, isn’t it?

Moreover, all remote actions are available on the general interface of your rig for your HiveOS set up:

Overclock your GPUs
On HiveOS, it is possible to overclock your GPUs, that is to say to optimize your mining performances!
But beware, overclocking is not a harmless practice and you must be responsible for your actions.
We have already written an article on how to overclock your GPUs, but we will give you a short reminder on how to do it on HiveOS.
In the main interface of your rig, go to the “Overclocking” tab.
This is where you will be able to enter some data to overclock your GPUs.

By clicking on the pencil, you can edit the data. For each element, you can indicate data corresponding to each GPU.
For example, our rig has two GPUs, which means that we can indicate two data, one for the first GPU in the rig, the other for the second GPU.

If you do not know what data to add for overclocking your GPUs, we invite you to discover our pages on overclocking data and more to optimize your mining.
That’s it! You now know how to set up HiveOS to mine with different GPUs.
It is a really easy to use tool, perfect when you are a beginner in mining. If you want to go further and become an ace on HiveOS, you can read our article on how to dual mine especially with for a HiveOS set up.
Start mining on Cruxpool to test overclocking and dual mining!