How to set up and use a Ledger Nano S?
Have you just purchased a Ledger Nano S for the purpose of transferring and storing your cryptocurrencies securely? Great!
It is interesting to invest in a Ledger to be totally in control of your funds and to avoid possible problems that could occur on an exchange. Indeed, unlike an exchange, your keys are not stored on a platform that holds your funds, but directly in the Ledger hardware crypto wallet.
We understand that a Ledger allows various functionalities such as transferring and storing cryptocurrencies. But how to set up and use your Ledger Nano S? We will see that in this tutorial, and much more!
Table of contents
Presentation of Ledger Nano S
For the story, Ledger was founded in 2014 and went straight into securing crypto wallets.
It has two well-known products on the market: the Ledger Nano S and the Ledger Nano X. These are two hardware crypto wallets that are very popular among cryptocurrency holders.
Hardware crypto wallets are some of the most robust for storing cryptocurrencies. With the help of the offline status of these crypto wallets and their private key, it is possible to send and receive cryptocurrencies securely, even when corrupted by malware. Moreover, these hardware crypto wallets allow you to verify any action via the screen they have.
The Ledger Nano S is a crypto wallet that comes in the form of a USB stick containing a private key. This key allows the owner to log in to a computer or trading platform that stores their cryptocurrencies.
With the help of the Ledger Live application, the Ledger Nano S can store more than 1,200 cryptocurrencies such as Bitcoin, Ethereum, Ethereum Classic or Litecoin.
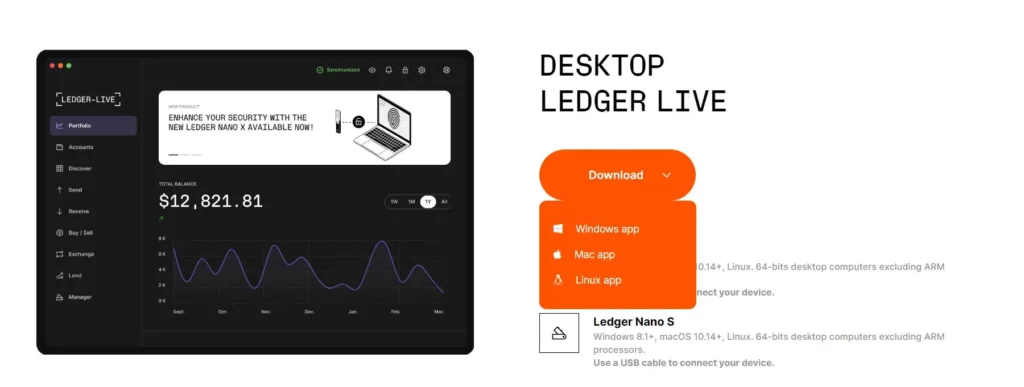
Installation of Ledger Live
Go to the Ledger website to install Ledger Live. Ledger Live is an application that has several features allowing the purchase, transfer, exchange or even staking of cryptocurrencies. It is therefore a very complete application for the use of Ledger hardware crypto wallets.
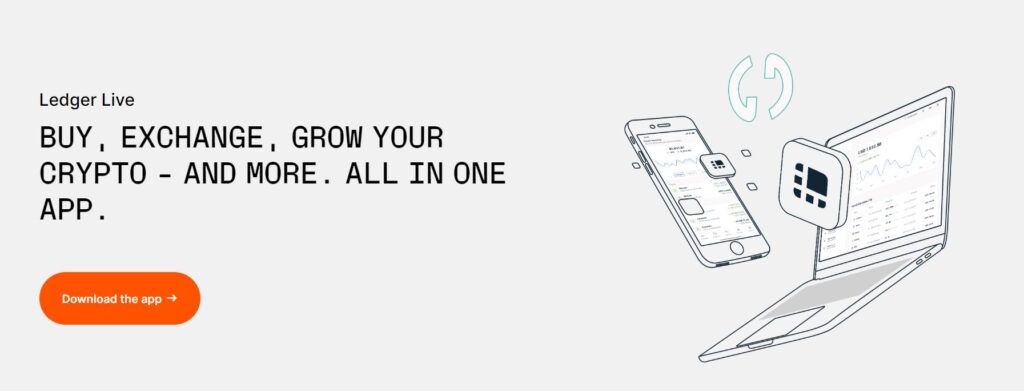
Ledger Live is available on both desktop (Windows, Mac, Linux) and mobile (Android and iOS).
To download Ledger Live, you must click on the desktop and/or mobile OS of your choice.
It is important to know that Ledger Live is compatible with Ledger Nano X and Ledger Nano S on Mobile Ledger Live and Computer Ledger Live.
The installation is very fast. You can request to start Ledger Live as soon as the application is installed.

Create a ledger Nano S account
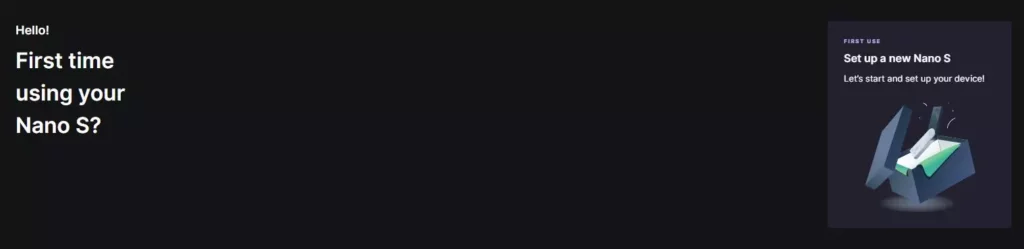
Register a Ledger Nano S on Ledger Live
It is useful to install Ledger Live to manage all your cryptocurrency transactions and perform more actions.
To register your Ledger in Ledger Live, go to “Manager”, “Setup device”, then choose “Set up a new Nano S”.
Note that if you have already set up your Ledger Nano S and have your recovery phrase, you will need to click on “Connect your Nano S”.
Scroll through the information offered by Ledger Live, then click on “Let’s do this!”.
The Ledger Live platform tells you that it will take about 30 minutes to install your Ledger (do not worry, it will take less time with the help of this tutorial) as well as other very useful information for the security of your Ledger crypto wallet.
You can click “Ok, I’m ready” to follow the instructions.
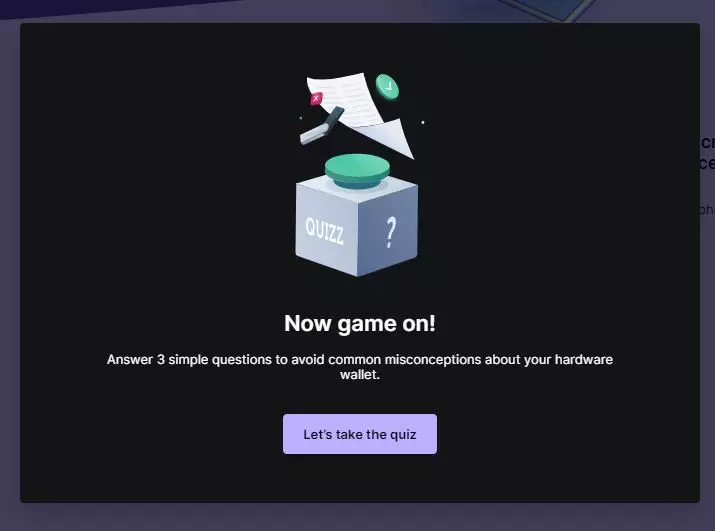
You will be asked to take a quiz to test your security knowledge.
Click “Let’s take the quiz” to answer three security questions.
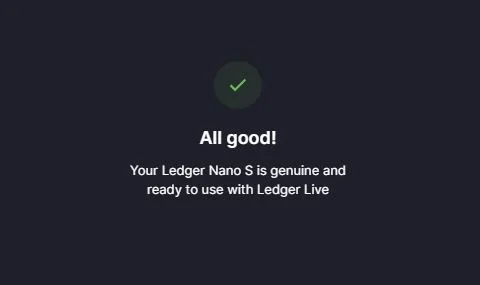
Then click “Next step” and “Check my Nano” to finalize the registration of your Ledger on Ledger Live.
Go to your physical crypto wallet to accept the Ledger Manager on your device by clicking on the two buttons.
Normally, you will get this message:
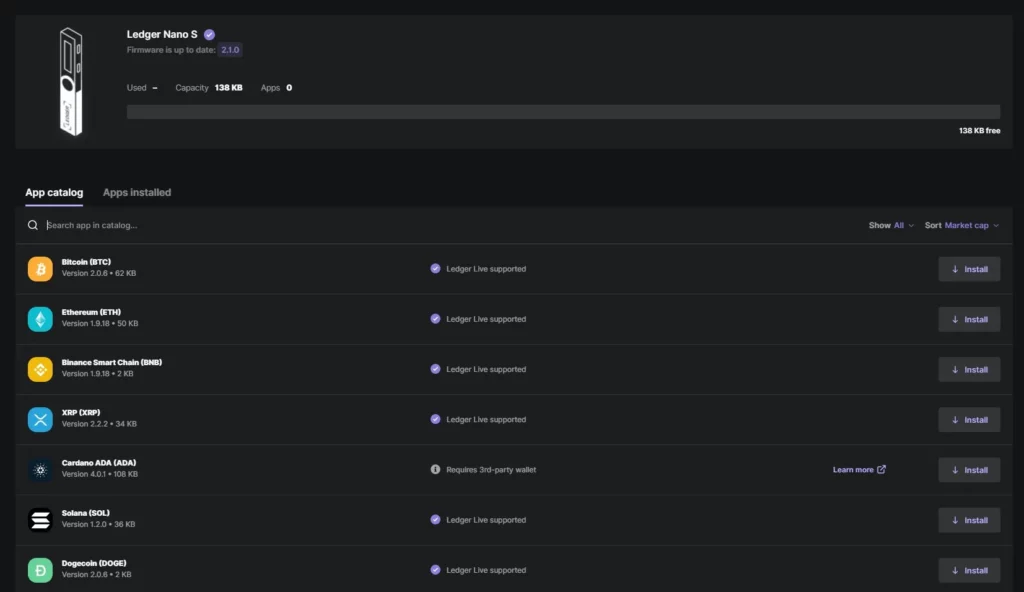
You will arrive at the Ledger Manager and you can install different applications depending on the cryptocurrencies you want to store with your Ledger Nano S.

Set up a Ledger Nano S
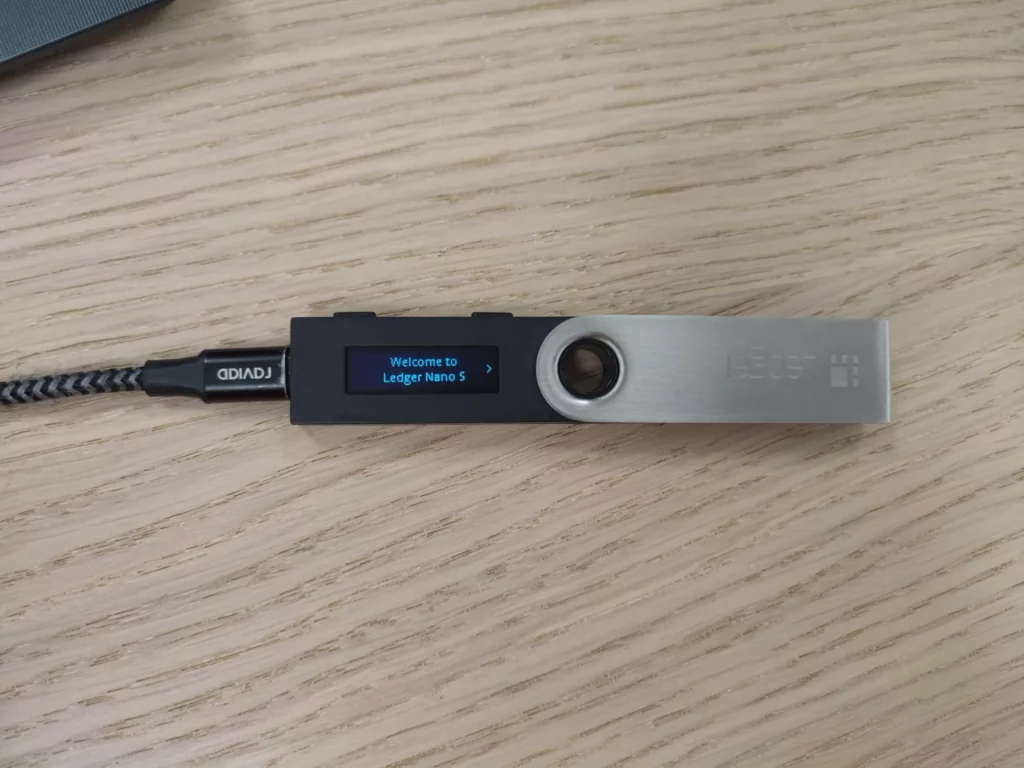
First, you need to connect your Ledger to your computer.
When this is done, you will need to use your hardware crypto wallet.
Read what it says on the screen and click on the two top buttons when the interface offers you to set up as a new device (“Set up as new device”).
Your Ledger will ask you to choose a 4 to 6 digit PIN code.
Warning: It is important to keep your PIN code in a safe place, because it is the code that will be asked each time you start your Ledger.
Then, your Ledger Nano S will ask you to memorize a recovery phrase of 24 randomly generated words. Just like the PIN code, you must keep your recovery phrase in a safe place, writing it down on a piece of paper out of sight. If you lose it, you may have a problem when you want to perform certain actions.
Click on the two buttons to validate the necessary and important information that your Ledger Nano S will display concerning the backup of your recovery phrase. Then, write down the 24 words in the exact order, from the 1st to the 24th word.
Then, confirm that you have written down all 24 words, and insert them one by one in the right order on your Ledger Nano S.
Your Ledger Nano S will remind you to keep your recovery phrase safe. Then click on the two buttons to continue.
Your Ledger Nano S will load and you can click on the two buttons to go to the dashboard.
Use Ledger Live
Add applications to Ledger Live
To store and transfer cryptocurrencies, you need to download what is called an app. Each cryptocurrency has an app.
For example, if you want to store and transfer Ethereum, go to “Manager”.
You will see various apps, including the Ethereum (ETH) app. Also, if you are looking for another cryptocurrency, you can directly indicate it in the search bar “Search app in catalog…”.
To download the Ethereum app, click on the “Install” button provided for this cryptocurrency.
After the download, you should be left with this information:
In addition to the Ethereum app, you also need to create an Ethereum account on Ledger Live to store and transfer this cryptocurrency.
Add an account for a cryptocurrency on Ledger Live
To create a crypto wallet account, you can either:
- Go to “Manager”, then “Add account”. This will take you to the “Accounts” section;
- Go directly to “Accounts”.
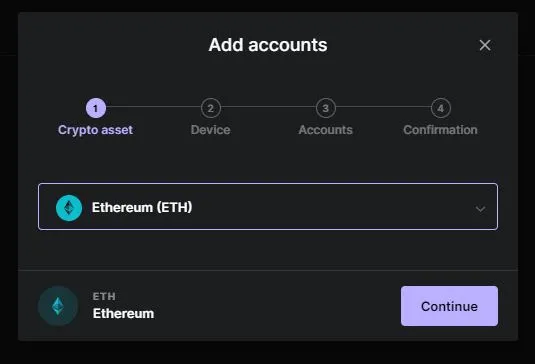
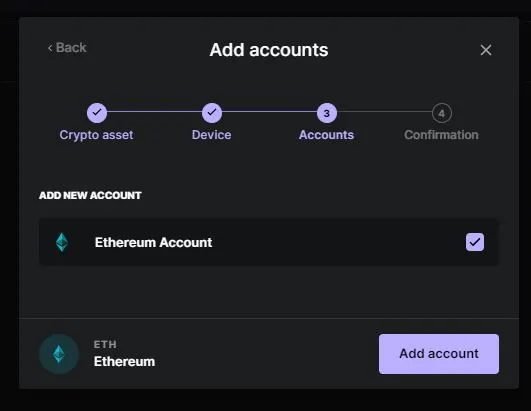
Once in “Accounts”, click on “Add account”.

A window will open and ask you to choose a cryptocurrency. We will choose Ethereum.
Click “Continue”. A synchronization will take place between Ledger Live and your Ledger Nano S.
Then you can rename and select your new Ethereum account. Click on “Add account”.
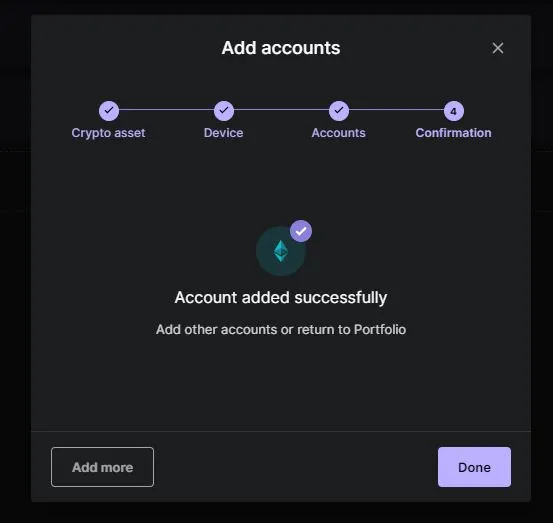
The account will be installed on your Ledger Nano S and on Ledger Live!

Send cryptocurrencies on Ledger Live
We will see how to send cryptocurrencies on Ledger Live. For this example, we will use an Ethereum Classic account.
Remember that you must have a Classic Ethereum account on your Ledger to send and receive Classic Ethereum. The same is true with other cryptocurrencies.
First, you need to go to “Send”.
A window will appear asking you to select the sending account and the address of the receiving account.

Next, you will be asked to enter an amount. You can choose to specify a specific amount or click the toggle to send the total amount available to your Ethereum Classic account.
You also need to choose whether you want fast, slow or medium fees. If you are not in a hurry, we recommend choosing medium fees.

As you continue, you will be presented with a summary of the main information about your transaction. If everything seems correct, you can continue.

Have your Ledger Nano S connected to your computer beforehand, as you are asked to verify the information on the device.
You must verify the recipient’s address, the amount and the charges.

Once the information is validated on your Ledger Nano S. Your transaction will be sent!
Please note that your account balance will be updated once the blockchain has confirmed the transaction.
Receive cryptocurrencies on Ledger Live
To show you how to receive cryptocurrencies on Ledger Live, we will use Ethereum Classic as an example.
Go to “Receive” on Ledger Live. A window will open and the application will ask you which account you want to credit. Of course, you must already have an Ethereum Classic account to receive the cryptocurrency.

Directly on your Ledger Nano S, confirm that you allow the app to connect to your physical crypto wallet.
Still using your Ledger Nano S, open the Ethereum Classic application.
On Ledger Live, you will find your Ethereum Classic public address that you can copy. Remember to check it on your Ledger Nano S and approve it.
You will then see your transaction on your Ethereum Classic account.
Secure your MetaMask account with Ledger
A physical crypto wallet also allows you to secure your MetaMask. Indeed, a manual approval from the key will be required to perform any outgoing transaction.
This can avoid losing your funds or having your wallet emptied. When you approve a contract until it is revoked, you expose yourself to risks.
Make sure you have the Ethereum application available on your Ledger for the connection with MetaMask to work. Your Ethereum application must be open.
Go to your MetaMask, then click on your account icon at the top right of the extension.
Click on “Connect a hardware wallet”.

Then click on “Ledger”.
You will be asked to connect the Ledger wallet. Click on “Continue”. Don’t forget to type your PIN code on your Ledger.
A browser window will open, you will have to click on “Nano S”.
A new page will appear, you can select your account on it.

After selecting and validating your address, your Ledger will be connected to MetaMask.
You will see your Ledger account on MetaMask with which you will be able to make transactions and more securely validate contracts or perform transactions.
As we have understood, the Ledger Nano S physical crypto wallet provides a high level of security. Moreover, it is relatively easy to use with the help of the comprehensive Ledger Live app.
It is a great way to store and transfer cryptocurrencies within minutes. Hence, its significant adoption by cryptoenthusiasts.
Also, if you mine Ethereum at Cruxpool (or want to mine with us!), know that you can connect your Ledger Nano S to the Layer 2 zkSync solution. Why do not you give it a try?